We are going to explain how to create UITableView using Storyboard in Swift iOS, after that we will give information of the table contents and other settings of the table like number of rows and sections, programmatically.
 |
| How to Create UITableView in Swift iOS -1 |
For this tutorial we are assuming you are aware of the delegate methods of iOS. No, need to be afraid if you don’t have an idea of delegate methods or if you are new with iOS. We will cover delegate topic in coming tutorials but for the time being you can go through this tutorial to have an idea of how to create UITableView in iOS.
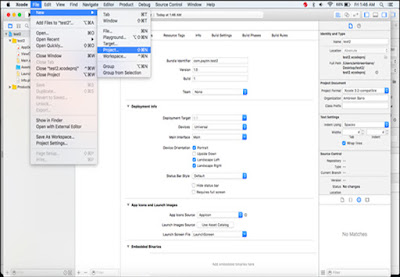
● If you are new for Xcode then don’t worry we will explain every step of the project. In xcode we have Menu as File, Click on File then New then click on Project as:-
Xcode → File → New → Project
● Controller class having some default code, it has method ViewDidLoad() . which is called when we run our project.
● Your project has StoryBoard in which we can design our UI. In the starting it has only empty View container as shown below.
● Now it’s time to design our table. Select table View from bottom right corner components and drag it inside View Container as shown below.
Related Topics:
1. Check Availability of Username in Database using PHP.
2. Generating Captcha in PHP for Verification.
3. How we sort MAP by Value in ascending order Java Code.
4. Iterator and List Iterator in Java.
● Now set constraints of the TableView with View container as shown below, connect “Center Horizontally in Container”, “Center Vertically in Container”, “Equal Width” and “Equal Height”.
● Adding Protocols as “TableViewDataSource” and “TableViewDelegates” and seperated by comma as shown below. These protocols are necessary for setting tableView rows, sections and row data.
class ViewController : UIViewController, UITableViewDataSource, UITableView Delegate
{
// All ViewController code Write here.
}
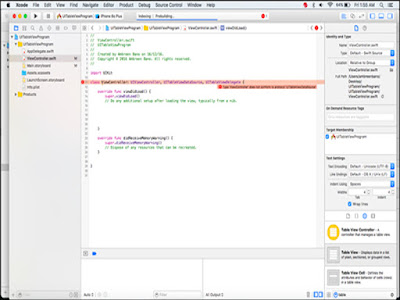
● Next, very important thing to remember is that if you are not implementing these delegate/Protocols then xcode will give error message as shown below.
● Now, it’s time to resolve above issue, for that need to implement some important delegate methods of the TableView, First write only “tableView” in your program as shown below then xcode will suggest all the tableView delegate methods then, you can select required one from drop down list and then, you can easily implement those delegate methods in your project.
● Some of the basic delegate methods which are necessary to implement are shown below.
// delegate methods of tableView
func tableView(tableView: UITableView, numberOfRowsInSection section: Int) -> Int
{
return 20;
}
Above method is for setting number of rows in the tableView. Whenever we are creating tableView, always it is needed to specify number of rows in tableView.
Above method is for setting data of the rows in the tableView by creating TableViewCell using tableView identifier String as shown above.
By default UITableViewCell having “textLabel” as Text Label for cells of the tableView. In this project we are using default table cell label. But, we can create own different kind of cell according to the requirement. We will show custom cell’s in advanced topics.
func numberOfSectionsInTableView(tableView: UITableView) -> Int
{
return 1;
}
Above method is for setting number of sections in the tableView. If we are not implementing this method then by default tableView create 1 section.
There are lot’s of tableView delegate methods available which we can use to set header footer and doing something on select/deselect of table row’s etc.
● Now create IBOutlet for TableView from storyboard to controller file as first select tableView + control then drag it to controller class and give IBOutlet name of the tableView as shown in image.
● When we create tableView we need to register TableViewCell class as for registering it. We will write code in ViewDidLoad() method using same reusable identifier string which we used in “cellForRowAtIndexPath” delegate method as -
override func viewDidLoad( ) {
super.viewDidLoad( )
// Do any additional setup after loading the view, typically from a nib.
tableView.registerClass(UITableViewCell.self, forCellReuseIdentifier: "tableIdentifier")
}
Your file code will look like this -
● Now, your project is ready to run.
Product → Run
● Now your project is running on the simulator and you can see your TableVew on the screen as shown below:
Please give me your valuable feedback in the comments. Thank you.
 |
| How to Create UITableView in Swift iOS -2 |
● Now a window will open in which you can select different templates for project according to your requirement.
For the time being we are selecting “Single View Window” then click Next as-
Single View Window → Next
 |
| How to Create UITableView in Swift iOS -3 |
● Now it is the time to choose options for your project as give Name of the project then select language as Swift then click Next.
Topics You May Interested:
1. Misconceptions About Blogging Newbie May Have.
2. Wordpress.com Vs Wordpress.org Blog: Which Platform is Best.
3. 10 Steps for creating effective Freelance Profile to get Business.
Topics You May Interested:
1. Misconceptions About Blogging Newbie May Have.
2. Wordpress.com Vs Wordpress.org Blog: Which Platform is Best.
3. 10 Steps for creating effective Freelance Profile to get Business.
● Now new project will open and Project file is ready to code as shown below.
 |
| How to Create UITableView in Swift iOS -5 |
 |
| How to Create UITableView in Swift iOS -6 |
 |
| How to Create UITableView in Swift iOS -7 |
Related Topics:
1. Check Availability of Username in Database using PHP.
2. Generating Captcha in PHP for Verification.
3. How we sort MAP by Value in ascending order Java Code.
4. Iterator and List Iterator in Java.
 |
| How to Create UITableView in Swift iOS -8 |
 |
| How to Create UITableView in Swift iOS -9 |
class ViewController : UIViewController, UITableViewDataSource, UITableView Delegate
{
// All ViewController code Write here.
}
 |
| How to Create UITableView in Swift iOS -10 |
 |
| How to Create UITableView in Swift iOS -11 |
 |
| How to Create UITableView in Swift iOS -12 |
// delegate methods of tableView
func tableView(tableView: UITableView, numberOfRowsInSection section: Int) -> Int
{
return 20;
}
Above method is for setting number of rows in the tableView. Whenever we are creating tableView, always it is needed to specify number of rows in tableView.
func tableView(tableView: UITableView, cellForRowAtIndexPath indexPath: NSIndexPath) -> UITableViewCell
{
let cell : UITableViewCell = tableView.dequeueReusableCellWithIdentifier ("tableIdentifier", forIndexPath: indexPath)
cell.textLabel?.text = "Hello Friends This is My UITableView";
return cell;
}
By default UITableViewCell having “textLabel” as Text Label for cells of the tableView. In this project we are using default table cell label. But, we can create own different kind of cell according to the requirement. We will show custom cell’s in advanced topics.
func numberOfSectionsInTableView(tableView: UITableView) -> Int
{
return 1;
}
Above method is for setting number of sections in the tableView. If we are not implementing this method then by default tableView create 1 section.
There are lot’s of tableView delegate methods available which we can use to set header footer and doing something on select/deselect of table row’s etc.
 |
| How to Create UITableView in Swift iOS -13 |
 |
| How to Create UITableView in Swift iOS -14 |
override func viewDidLoad( ) {
super.viewDidLoad( )
// Do any additional setup after loading the view, typically from a nib.
tableView.registerClass(UITableViewCell.self, forCellReuseIdentifier: "tableIdentifier")
}
Your file code will look like this -
 |
| How to Create UITableView in Swift iOS -15 |
Product → Run
 |
| How to Create UITableView in Swift iOS -16 |
 |
| How to Create UITableView in Swift iOS -17 |
Please give me your valuable feedback in the comments. Thank you.


4 Comments
Dear Sir,
ReplyDeleteI read this article from start to end and i like this post, you describe each and everything nicely in simple language along with images, i am looking forward for more articles on IOS Programming....
Thank You
Ankita
I am getting bug in this code i don't know why it is coming which version of Xcode you are using?
ReplyDeleteWe write this code using Xcode V-7.2
Deleteimages are not clear
ReplyDelete